
This post contains affiliate links. For more info, see my disclosures here.
A few months ago, the only thing I knew how to do on the internet was check email and go on Facebook and Pinterest. So when my husband Nick suggested I start a blog, I thought it was out of the question. Well, it turns out that there are many reasons to start a blog, and it’s a lot easier than you think! The only thing I’d do differently is start one earlier!
Reasons to Start a Blog
- Share your message – Nick and I started Awaken Happiness Within to inspire ourselves and others to find happiness within and share it with the world.
- Looking for a creative outlet – A blog is a place where you can showcase your talent. You can have fun while You can share all of your ideas and inspire others.
- Become a better writer – Maintaining a blog requires regular writing. One of the fastest ways to become a better write is to write regularly.
- Connect with others – There are many ways to connect with people through your blog. You can send a link to friends and family. You can promote through social media. This is a place where you can have conversations with others on the topics you care about.
- Make money from home – There are so many ways to make money from a blog. You can use ads, affiliate income, sell your own products and more! Whether you want a little extra money or a full time income, blogging can make it happen for you! Many people make more money from their blog than they did when they were working full time for someone else!
How to Start a Blog
- Choose hosting – I recommend and use Bluehost. They have 24/7 support and have always been able to solve any problem I have had. They are one of the top hosting companies. Through my link you can start your own website at a discounted rate of as little as $3.45 per month. You also receive a free domain (website name) when you use my link. (Thank you for the support!)
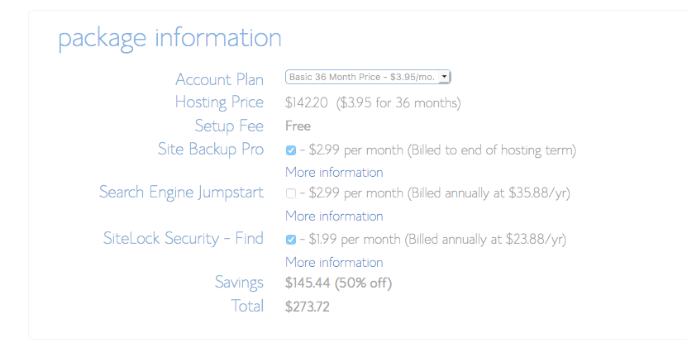
You will need to choose a hosting plan. Remember, the longer the term you select, the lower your monthly fee will be. You will pay for the entire term up front. At the beginning, you will likely only need the Basic plan. If you find that you outgrow that plan and need to upgrade, you can do so and pay the difference in plan costs.
**Pro tip** Make sure you purchase the Domain Privacy Protection for $0.99/month! This protects all of your contact information. Otherwise, you will start getting numerous emails, text messages and phone calls every day. Take it from someone who has been there. You shouldn’t need any of the other extras that Bluehost sells.
You will receive a free domain (which is your website name), an $11.99 value. It’s OK if you don’t know what you want your domain to be. They will credit your account, so you can choose your domain later.
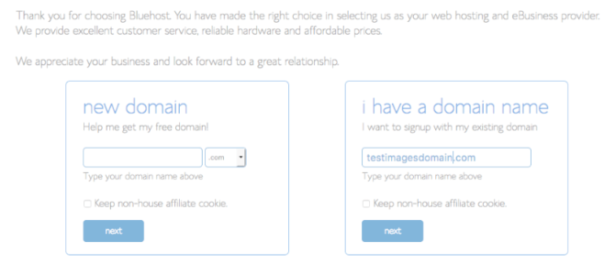
2. Next, you will need to choose a domain name. Your domain name is your website name. Enter it in the new domain box and click next.
![]()
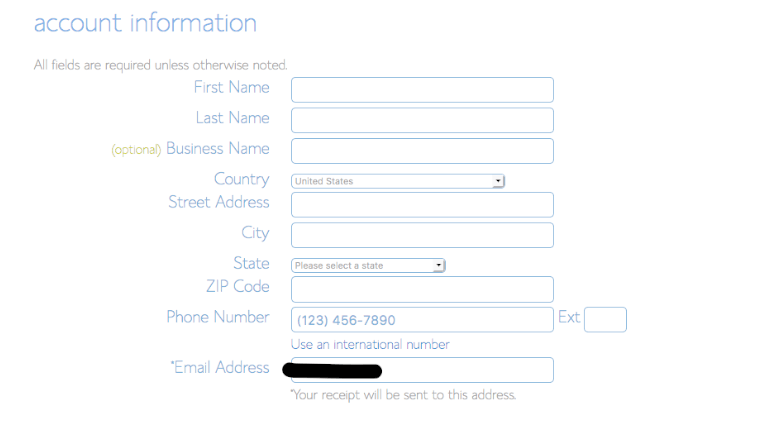
3. Enter your account information.
4. Choose your package information. Remember that you will get the best rate with the longest term (36 months). Bluehost does charge you the complete amount up front. They have a money back guarantee, so if you need to cancel or change hosts, you will get back the money for the months you haven’t used.
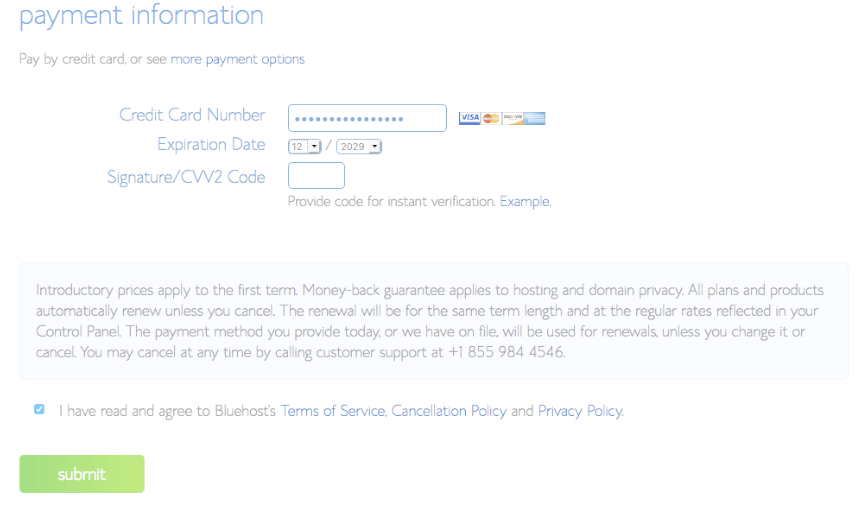
5. Enter your payment information. Then check the box stating that you agree to the services and click next.
6. Then you will be asked to create a password. Click on the green button to go to the next screen.

7. Create a strong password. Make sure you keep it somewhere safe in case you forget it!
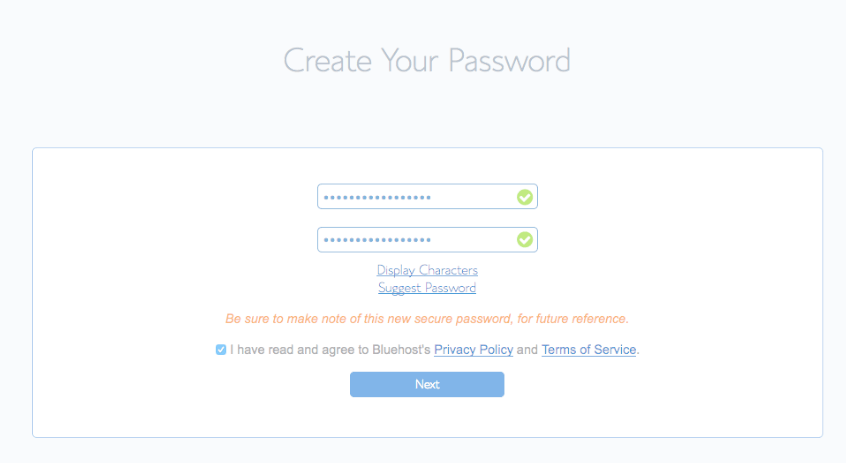
You will see a Congratulations screen and will use your new password to log in to Bluehost.
8. Install WordPress. Bluehost makes it very easy to set up a WordPress blog for free. All you have to do is click the “Install WordPress Now” button and follow the prompts. Also included is an SSL certificate.
WordPress.org vs. WordPress.com
WordPress.org is where you will have your own self hosted blog, meaning you are the owner of your site. You have full control over your site and are in charge of what content appears. This means that you will be able to customize your site. In addition, you can monetize your site in a way that works for you.
WordPress.com is a free platform for people to create blogs. It may work well for hobby bloggers. One downside is that there will be ads placed that are out of your control (and that you receive no money from!). In addition, you are unable to earn money through ads, affiliate income, or products. You can also have your entire site removed for any reason at any time.
9. You will be prompted to pick a theme. Choose whatever one strikes your fancy. The theme can be changed at a later date if you decide you’d rather have a different one.
10. Click on the blue Start Building button.
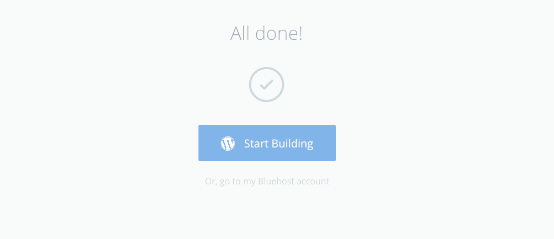
11. Next, you will choose what kind of site to set up. If you’re planning on making money from your new blog, even if it is down the road a bit, I recommend choosing a business site. It gives you options and flexibility for later.
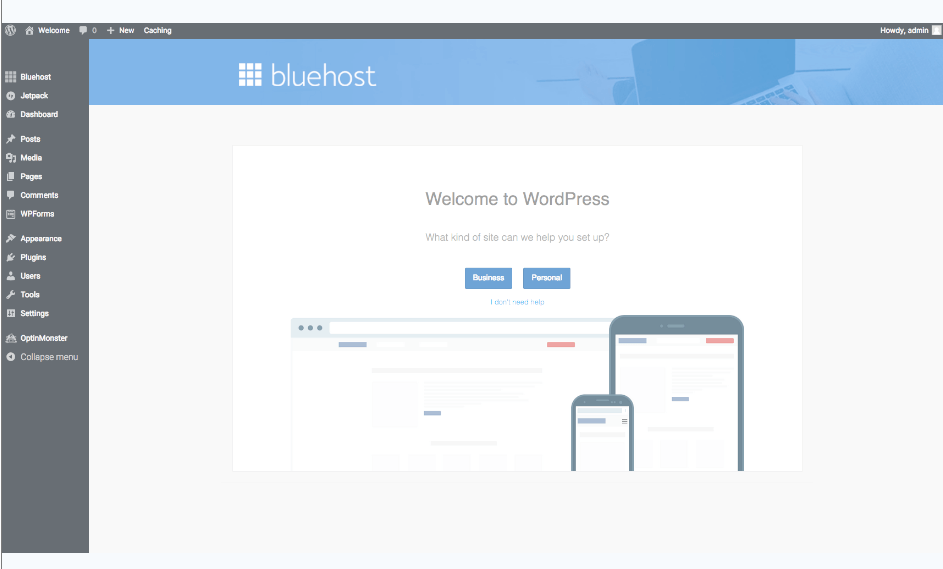
12. You will see a blue “Launch” button. That is only meant to be clicked upon when you are ready to launch your site. At the beginning, there is noting on your site. Wait until you have created some content before launching your site!
Customize It!
Now here is the fun part! You get to choose a theme and make your site beautiful! I am not a website designer and decided to go with the Genesis theme. Many top bloggers use it. Genesis gives me all of the essentials needed to build a strong website. Then, to make it pretty, I used the Brunch Pro child theme. Brunch Pro is fully customizable. I customized Awaken Happiness Within myself. StudioPress Themes for WordPress is where I purchased both the Genesis theme and Brunch Pro child theme. I was able to receive a discount on the child theme because I was a returning customer.
Pro Tip: A parent theme is what gives the functionality to your website (SEO, security, performance, etc.). The child theme allows you to customize your website’s look and feel without needing to modify the files (great for someone who doesn’t know how to code).
As I mentioned above, all I knew how to do was check email, Facebook and Pinterest. I really wanted more information and purchased Building a Framework. In it Abby Lawson teaches the technical side of blogging. There are nine modules, including videos to show you exactly how things work. Also included are multiple tech trainings, a 30 page workbook, a private Facebook group, her Building a Framework ebook, how to make printables tutorial, bonus videos and lots of other bonus material. It was worth the price for the first module alone! She also has a free 10 Day email course to help you get started.
I also highly recommend the book Pinteresting Strategies by Carly Campbell. As a new blogger, I was getting anywhere from 30 – 80 page views a day. A few weeks after implementing Carly’s strategies I had 565 pagviews in one day. It dropped back to the 80 – 100 range for a few days and then went from 173 four days later to 1254 the next day! Remember that it is normal for pageviews to vary from day to day.
For more blog related resources, check out the Recommendations page.
You can do this! Your message is important and the world will benefit from it! The best time to start is now. You will be so glad you did.


Awesome tips for someone looking to start blogging. I actually followed some of Abbys articles when I started my blog too
Thank you Venassa. 🙂
Great tips and information! Wish I had this when I started my blog! Totally useful for any new blogger!
Thank you so much Christine! I am glad it will be helpful!